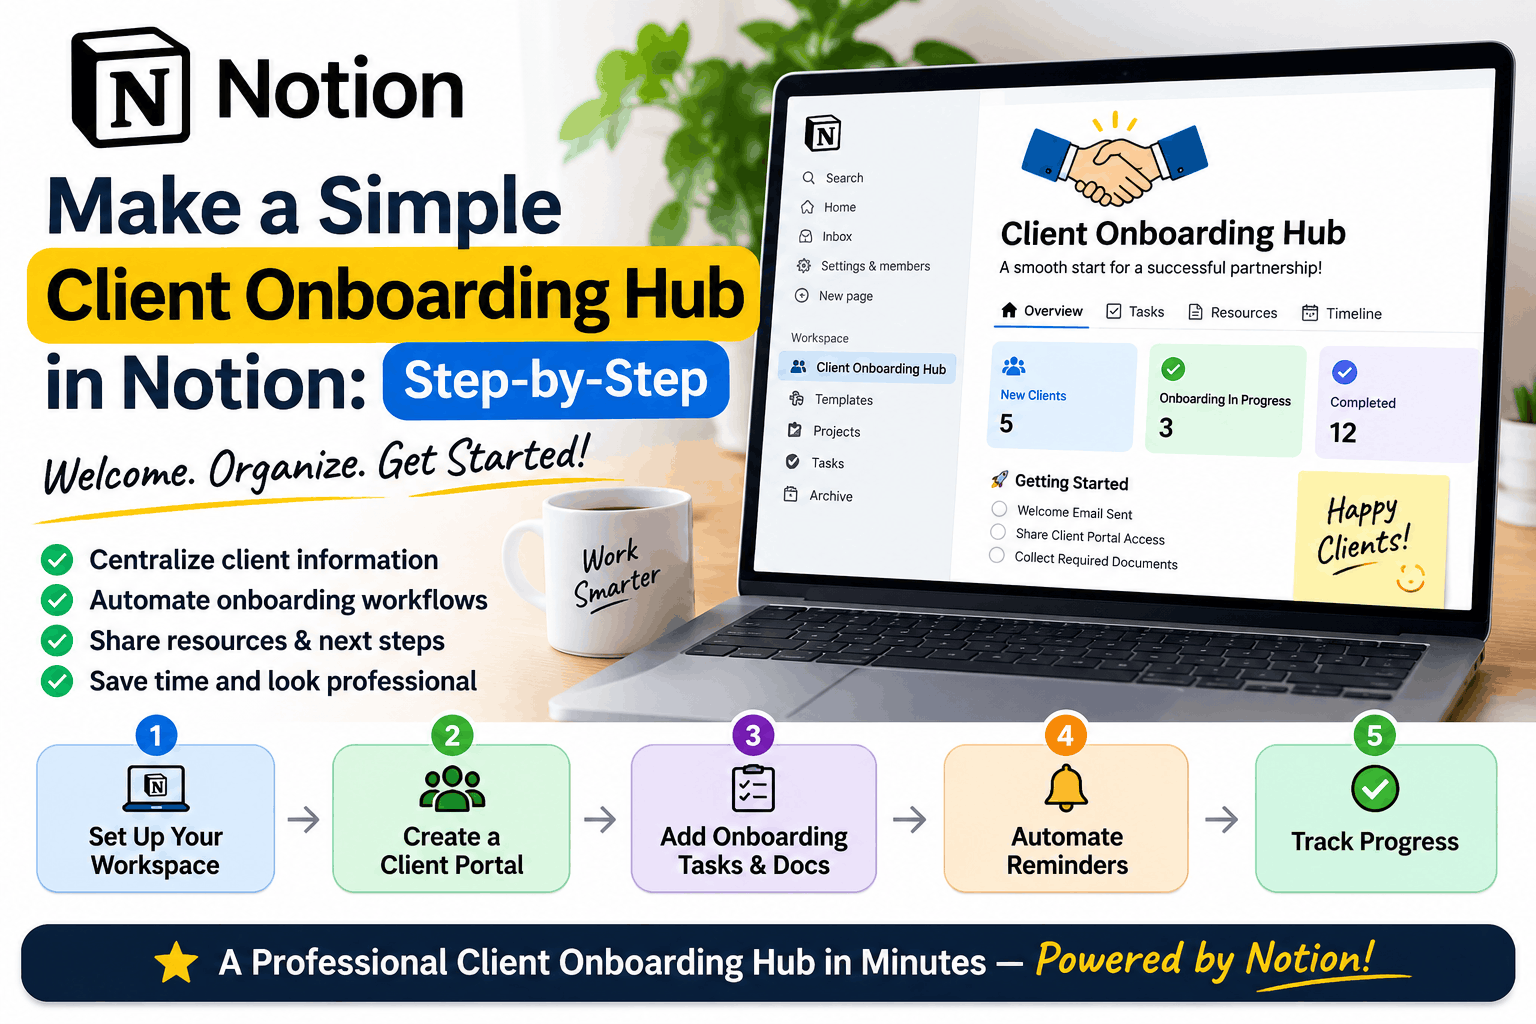
Make a Simple Client Onboarding Hub in Notion: Step-by-Step

Make a Simple Client Onboarding Hub in Notion: Step-by-Step
Starting a new client project should feel organized and professional from day one. But for many freelancers, consultants, and small agencies, onboarding often means sending multiple emails, chasing documents, sharing links, scheduling meetings, and answering the same questions repeatedly.
A simple client onboarding hub can solve much of this chaos.
With Notion, you can create a centralized workspace where clients can find project information, complete onboarding tasks, share requirements, review timelines, and communicate important updates—all without investing in expensive client portal software.
In this guide, you’ll learn how to create a simple, reusable client onboarding hub in Notion, step by step.
What Is a Client Onboarding Hub?
A client onboarding hub is a central digital workspace that helps new clients understand how your service works and what they need to do before the project begins.
Instead of sending information across emails, messaging apps, and scattered documents, you provide one organized location for everything your client needs.
A typical client onboarding hub includes:
- Welcome message and introduction
- Project overview and scope
- Client questionnaire
- Required documents and assets
- Project timeline
- Tasks and responsibilities
- Meeting links
- Frequently asked questions
- Contact information
For freelancers and independent professionals, this creates a smoother experience while reducing repetitive administrative work.
Why Use Notion for Client Onboarding?
Notion is a flexible workspace that combines documents, databases, task management, and collaboration in one platform.
You don’t need to build a complicated system to get started. A single well-organized page can serve as your client portal.
Benefits of using Notion
1. Everything in one place
Clients can access project information, checklists, resources, and important links without searching through old emails.
2. Reusable onboarding templates
Create one onboarding page and duplicate it for every new client. This saves time and ensures you follow the same process consistently.
3. Professional client experience
A clean, structured onboarding page makes your service feel organized and establishes expectations from the beginning.
4. Less administrative work
Instead of repeatedly explaining your process, share your onboarding hub and let clients follow the instructions at their own pace.
5. Flexible and inexpensive setup
You can build a simple onboarding experience using basic Notion features without purchasing dedicated client portal software.
What You Need Before You Start
Before building your hub, prepare the following:
- A Notion account
- Your service description
- A standard project workflow
- A list of information you collect from clients
- Your preferred communication channels
- Links to scheduling, payment, file-sharing, or project tools
Keep your first version simple. You can always add automation and integrations later.
Step 1: Create Your Client Onboarding Page
Open Notion and create a new page.
Give it a clear title, such as:
Client Onboarding Portal — [Client Name]
Add a short welcome message at the top.
Example:
Welcome aboard! This workspace is your central location for everything related to our project. You’ll find the project overview, onboarding checklist, required information, important links, and next steps here. Please complete the onboarding tasks so we can begin smoothly.
Add a cover image and a simple icon if you want to make the page more visually appealing.
Avoid unnecessary decorations. The goal is to make the page easy to navigate.
Step 2: Add a Project Overview
Create a section titled Project Overview.
Include the most important project details so both you and your client have a shared understanding of the engagement.
You can use a simple table:
| Field | Details |
|---|---|
| Client Name | Client or company name |
| Project Name | Project title |
| Service | What you’re delivering |
| Start Date | Planned start date |
| Target Completion | Estimated delivery date |
| Project Owner | Your name |
| Communication Channel | Email, Slack, or other |
| Meeting Schedule | Weekly, biweekly, or as needed |
This section helps prevent confusion about the project’s purpose, timing, and ownership.
Step 3: Build an Onboarding Checklist
A checklist is one of the most useful parts of your onboarding hub.
Add a heading called Client Onboarding Checklist and create tasks using Notion’s checkbox blocks.
Example checklist:
- Review the project scope and deliverables
- Complete the client questionnaire
- Share relevant documents and assets
- Confirm project goals and success metrics
- Complete payment or deposit requirements
- Schedule the kickoff meeting
- Approve the initial project plan
Make the checklist actionable and easy to understand.
You can divide it into two sections:
Client Tasks
- Provide business information
- Share project requirements
- Upload required assets
- Approve deliverables and timelines
Your Tasks
- Review client information
- Prepare the project plan
- Confirm deliverables
- Schedule the kickoff
- Set up project tools
This creates accountability on both sides.
Step 4: Create a Client Questionnaire
Most projects require information before work can begin. Rather than collecting it through several email exchanges, create a dedicated section called Client Questionnaire.
You can use a Notion form, a linked form tool, or a simple set of questions on the onboarding page.
Suggested questions:
Business Information
- What is your business name?
- What products or services do you offer?
- Who is your target audience?
- What makes your business different?
Project Goals
- What problem are you trying to solve?
- What would a successful project look like?
- What are your top three priorities?
- Are there any important deadlines?
Requirements
- What existing tools or systems are involved?
- Do you have examples or references?
- Are there any technical or operational constraints?
- Who will approve the final deliverables?
Communication
- Who is the primary point of contact?
- How frequently would you prefer updates?
- What is your preferred communication channel?
Keep the questionnaire relevant to the service you offer. A web development client should not receive the same questionnaire as a marketing strategy client.
Step 5: Add a Project Timeline
Create a section titled Project Timeline & Milestones.
A basic project timeline could look like this:
| Phase | Activity | Status |
|---|---|---|
| Phase 1 | Discovery and onboarding | Not Started |
| Phase 2 | Requirements and planning | Not Started |
| Phase 3 | Execution and development | Not Started |
| Phase 4 | Review and feedback | Not Started |
| Phase 5 | Final delivery | Not Started |
For a more advanced setup, create a Notion database with properties such as:
- Task
- Phase
- Status
- Due Date
- Owner
This allows you to track work as the project progresses.
Don’t promise fixed dates until requirements and dependencies are understood. Use estimated milestones during onboarding and confirm the final timeline after reviewing the client’s inputs.
Step 6: Create a Shared Resources Section
Clients frequently need access to documents, links, and reference materials.
Create a section named Project Resources.
Include links to items such as:
- Project proposal
- Statement of work
- Shared drive
- Brand guidelines
- Meeting notes
- Project management board
- Design files
- Technical documentation
- Frequently asked questions
Organize resources into categories instead of presenting clients with a long list of links.
For sensitive information, use appropriate access controls and dedicated secure tools rather than treating a publicly shared Notion page as a secure document repository.
Step 7: Add Communication Guidelines
Communication expectations should be established early.
Create a section called How We Work Together and explain:
- Where project communication happens
- Your typical response time
- When status updates are shared
- How feedback should be submitted
- How revisions are handled
- What happens when project scope changes
- How urgent requests are managed
Example:
Communication Guidelines
- Routine communication: Email
- Project updates: Weekly
- Feedback: Consolidated comments whenever possible
- Meetings: Scheduled in advance
- Response time: Within one business day, subject to working hours
- Scope changes: Reviewed and approved before additional work begins
Clear expectations reduce unnecessary interruptions and make the working relationship more predictable.
Step 8: Add a Frequently Asked Questions Section
A small FAQ section can eliminate repetitive questions during onboarding.
Example:
When will work begin?
Work begins after onboarding requirements are completed, project scope is confirmed, and any agreed initial payment has been received.
How can I track project progress?
Project milestones and status updates will be shared through the designated project workspace.
How should I provide feedback?
Please provide consolidated feedback through the agreed communication or review channel.
What happens if I need additional work?
Additional requests outside the agreed scope will be reviewed and estimated separately before proceeding.
What happens if I miss a deadline?
Client-side delays in providing information, feedback, or approvals may affect the project schedule.
Customize these answers based on your actual business policies.
Step 9: Create a Clear Next Steps Section
Don’t let clients finish reading the page and wonder what to do next.
Add a prominent section called Your Next Steps.
For example:
- Complete the onboarding questionnaire.
- Upload the requested documents.
- Review and confirm the project scope.
- Schedule the kickoff meeting.
- Complete the onboarding checklist.
Keep this section near the top of the page or repeat it at the bottom.
Your client should always know the next action required.
Step 10: Turn It Into a Reusable Template
Once your onboarding hub is ready, save it as a reusable template.
For each new client:
- Duplicate your master onboarding page.
- Replace the client name and project details.
- Update the timeline and milestones.
- Customize the questionnaire.
- Add relevant resources.
- Review permissions and sharing settings.
- Share the page with the client.
This turns onboarding from a repetitive manual process into a repeatable workflow.
Recommended Client Onboarding Hub Structure
Here is a simple structure you can copy into Notion:
CLIENT ONBOARDING HUB
- Welcome & Introduction
- Project Overview
- Client Onboarding Checklist
- Client Questionnaire
- Project Timeline & Milestones
- Project Resources
- Communication Guidelines
- Frequently Asked Questions
- Your Next Steps
- Contact Information
You don’t need a dozen databases or complex automations to make this useful. Start with a single page and add functionality only when you identify a genuine need.
Common Mistakes to Avoid
Making the hub too complicated
Too many sections, databases, and views can overwhelm clients. A simple onboarding page is often more effective than an elaborate workspace.
Asking for too much information
Collect only the information you need to begin. Long questionnaires can create unnecessary friction.
Forgetting permissions
Before sharing your hub, review page permissions, linked resources, databases, and any embedded content. Make sure clients can access only the information intended for them.
Leaving the next step unclear
Clients should not have to guess what to do after reading the welcome page.
Using the same template without customization
A reusable template is a starting point—not a substitute for understanding the client’s project.
How to Improve Your Onboarding Hub Later
After using your onboarding page with a few clients, you can improve it by adding:
- Automated welcome emails
- Notion database templates
- Client-specific project dashboards
- Form integrations
- Scheduling integrations
- Payment status tracking
- Automated task creation
- AI-assisted questionnaire summaries
- CRM integrations
Start with the simplest workflow that works. Automation should reduce effort, not create a new system that needs constant maintenance.
Final Thoughts
A professional client experience doesn’t necessarily require expensive software or a complicated process.
A simple Notion client onboarding hub gives freelancers and small businesses a central location for project information, checklists, requirements, communication, and next steps. It helps clients feel confident, reduces repetitive administration, and makes it easier to deliver consistent services.
Build your first version in one page, test it with a real client, and improve it gradually.
The best onboarding system isn’t the most complicated one. It’s the one your clients actually use.